I got my artwork on December 3rd, (I have no pics today, just a description on what I did). However, the SF2 marquee is really dark. Too much black and barely any pink and purple. Hopefully it looks good when I put light behind it. It's great to finally have the CPO, but unfortunately I am still unprepared for it. I don't have the plexi done and I need the bare CP to help drill the holes for the plexiglass. I rushed out to the store last night and bought a sheet of 18x32 acrylic for around $17 dollars. It's enough for me to experiment with and mess up a few times.
I had some Xacto blades lying around that I've lost, so I had to make do with a razorblade holder/box opener. It bent on the first swipe and made a bad crooked line that strayed off of my straightedge onto the good material. First mistake was to use a cheap razorblade. Second mistake was to go too quickly with my cut. Third mistake was to use a 3/4" piece of MDF as my straigtedge (too tall). Fourth mistake was to press the straightedge into the scrap material instead of holding it down over the finish material. Fifth mistake was to rush things.
Eventually I used an Xacto knife with an old blade to score the plexi. I made many, many slow cuts as deep as I could on the top edge of the plexi. After scoring, I took it to the coffee table and pushed down quickly and it snapped loudly. Unfortunately the snap followed the line of one of the mis-cuts and I had a crooked edge. The other cuts weren't much better. It seems that if you don't score deep enough, the crack strays from the line at the edges. You really have to score pretty deeply when doing short cuts to get the crack to follow the straight line.
To correct the bad cuts, I used a dremel tool with a cutoff disk. At too low a speed, it melts the plastic too much. It stinks. Also, human hands can't cut straight enough while holding one of these things. The cut looks wobbly and I ended up with a lot of melted bits clinging to the dege. I used a file to knock it down and a sanding drum to smooth things out. The sanding drum works very well, but it's too easy to take off too much material and increase the uneven look of the cut.
Drilling holes, I made some observations. Making small drill holes, there's no problem whatsoever. Go nuts. Using a big, sharp drill bit will tend to crack the plexi when digging in for the first time. Going fast helps, but the torque always cracks the plexi when it catches. What I did was drill all the holes, even the button holes with a small bit. My kit has these useless drill bits with a point at the end that aren't any good for drilling much of anything. But on plexi eventually the dig in and make the hole. When I had that as a pilot hole, I got out the hole saw. What I noticed about using the hole saw was that the drill bit in the center of this thing is big, like 5/8". When this monster digs into the small pilot hole, it cracks the plexi every time. It's not much of a problem with button holes because the hole saw part will cut out the cracked area. After the center bit gets through, the holesaw teeth dig in. If you hit with the teeth at full speed, you have the chance at another crack, but usually it won't. Start your cutting, but slow down when it's just about to punch through. If you're going too fast when it punches through, you'll get another crack.
After I had all the holes done, I went around to all the bolt holes and made them square with a drywall cutting tool on my dremel. It works very well eating away at the plexi. Great choice to square off the bolt holes.
I ended up with a good piece with crooked edges and about 4 cracks. I'll obviously have to do it again. Here's the process I'll use when doing this on the next piece of material:
- Use a heavy duty razor knife and take plenty of time to score deeply
- Use a flat straightedge and cut slowly and deeply with short strokes
- Make sure your straight edge is on the finished side to help protect it
- Take your time, your only chance on a straight cut is on the first snap
- When it comes time to snap, use a good flat, sharp surface and snap hard and fast
- When doing holes use a small drill bit
- When doing button holes widen the small hole with a drywall cutter bit on your dremel or slightly bigger drill bits so that your hole saw drill bit doesn't have to punch through
- When using the hole saw, slow down before it punches through.
Friday, December 7, 2007
Cabinet And PC Wiring

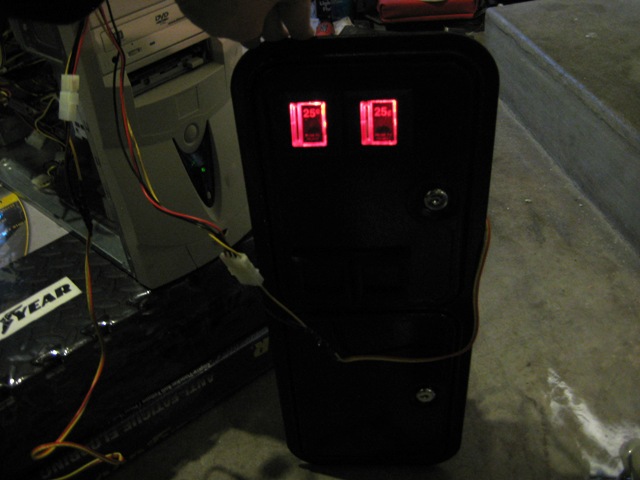
Once I had the coin door ready, I had to wire it up. The lights are just automotive bulbs, so they take 12 volt DC, easily supplied from the computer's power supply. I just took a female molex connector and made a wiring harness for it. I ran out of heatshrink tubing and the electrical tape I'm using barely sticks, hence the zip ties holding the whole works together.

On a 4-pin molex cable, yellow is 12v, the black ones are ground, and red is 5v. Once hooked up, the coindoor bulbs light up beautifully.

While I was futzing around with the coindoor lights, I also put a female molex connector on the 12v input on my powerstrip relay.
 To turn the computer on, I wanted to extend the computer's power switch to the outside of the cabinet. It was already setup with a switch, I just removed the existing toggle pushbutton that the cabinet used to switch on the mains power to a momentary contact pushbutton like ATX uses.
 For the wires, I didn't want to hack into the case or cutoff the PC's power switch headers. I had a couple header blocks from a newer motherboard I have and decided to use those. I soldered the end of the switch onto two pins on the header block and plugged them in. So now I have two PC power buttons. I ran out of wire so it's a bit short, I may have to redo the switch.
Thursday, December 6, 2007
Coindoor Refurbishing

I stripped all of the parts off of the coindoor before painting. I found that the plastic parts were very worn and old with some ugly spraypaint here and there. I started cleaning them and found that the more I cleaned, the worse they looked. Maybe I'll repaint them later, but for now, I'll leave them as they are.
I did polish the coin eject buttons a bit
Before:

After:


The coin mechs were ugly and coated with old dirt, grime, rust, and oxidation.

One acceptor barely took quarters, while quarters always got stuck in the other. Opening her up, you can see why. They're caked with
 rust.
rust.It's a wonder that quarters slide through these things at all!

After scrubbing these parts for a couple hours with Brasso, they look great now.
More results:


Reassembled and back on the dry door, they look new again

The finished product:

Spraypainting CP And Coindoor

After I stripped and filled my control panel, I hit it with a coat of primer before getting ready to paint the corners black.

I'll be using a can of classic black RustOleum spraypaint.

Painted the corners of the control panel.

Then I painted the coin door. I used about 4 coats on the coindoor.
Happ Parts Came In

On Thursday, November 29th, I got my first batch of parts from Happ.
1 Coin door bucket
12 Happ Pushbuttons with horizontal microswitch
3 Cam locks
10' marquee retainer
50 18-22ga, .187" female quick disconnects
Unfortunately my 1 1/8" cam lock didn't come with the screw to attach the actual cam, so I can't attach my back door until Happ sends me a new one. But they haven't returned my emails yet. :-\ . Looks like another part I'll have to scavenge for.
Sunday, December 2, 2007
IPac Wiring, Speakers, And Powerstrip Hacking
 I've gotten a lot done in a few days. I worked on the control panel, marquee lighting, power relay, and speakers. Here's a rundown:
I had a good idea on how to install my iPac to make the control panel modular. In the future, if I choose to change control panels, I'll have it so that I can undo a few bolts and plugin another control panel and be good to go. I'll be able to make several control panels without spending cash on an iPac for each one. Sorry Andy.
I had a project box laying around that I bought for a Winamp controller project that failed miserably. I put the iPac in the box and cut out openings for the PS2 connectors.

I also cut out two long trapezoids for a pair of female DB25 connectors. One for each player. The other existing holes in the box were from the previous project.
The DB25 connectors are setup with a soldering cup at the end of each pin for easy soldering of the wires. I used 22ga stranded wire and inserted the wire and soldered it in place. It was pretty hard to solder the joint without melting the plastic holding the pin and making it loose. I used shrink tubing and a lighter to keep things looking clean.
 After all the pins soldered. I only used 14 pins out of the 25. This allowed me to space the welds out and made it a bit easier to solder. My pinout diagram and the fact that the pins on both the male and female connectors are properly labeled was a lifesaver.
[img]http://fredgolden.net/mame/images/ipac_box4.JPG[/img]
Now we're all hooked up. Ready to screw on the cover and mount in the cab.


 I repeated the process twice more to make a couple wiring harnesses that will connect to all the buttons and sticks in the control panel. I'll use a premade DB25 extension cable to connect this harness to the iPac enclosure I made.
Next I tackled lighting. Behind the marquee there was a simple light fixture.
 I just grabbed one of the hundred PC power cables I have lying around and chopped the female end off of it and soldered it to my light fixture. Simple stuff, piece of cake.
Behind the light was a single old speaker I ripped out. I mounted a pair of Creative 2.1 PC speakers and secured them by adding a couple strips of wood.

I cheaped out and left the bracket on them so I could zip tie them in place. Kind of a lame accomodation, I know
 While I was out and about earlier today, I visited Radio Shack and picked up a 12VDC / 10Amp DPDT relay switch and installed it into a powerstrip. I used this awesome tutorial: http://spystyle.arcadecontrols.com/01/index81.htm, it was pretty darn easy.
See, it passed the smoke test!

Subscribe to:
Comments (Atom)